
- About EndNote
- Install EndNote Desktop
- Create an EndNote Library
- Add References to EndNote
- Create In-Text Citations and Reference List
- Edit / Remove a Citation
- Organize References

Note: The EndNote software is strictly for use by current students and staff at SFU/CBCC only.
EndNote is a reference management software that assists you to:
- Store and manage your bibliographic references
- Search online resources for additional references
- Create in-text citations for your papers
- Build a bibliography
- Share personal library of references with your fellow partners
EndNote Web: http://www.myendnoteweb.com
- Make sure all other Microsoft Office applications (e.g Word, Powerpoint) are closed before the installation.
- Uninstall the older version of EndNote before installing a new version.
- Go to https://libapps.cihe.edu.hk/EndNote
- Login using your network login / windows account
- Read through the Conditions of Use of the EndNote Software
- Select your operating system and an appropriate EndNote version to download the installer
[Note: You are recommended to install EndNote 21 for Windows 10 or later] - Double click the installer to start the installation
- Select “Typical” as the installation type
- Follow the remaining instructions from the EndNote Setup Wizard to finish the installation
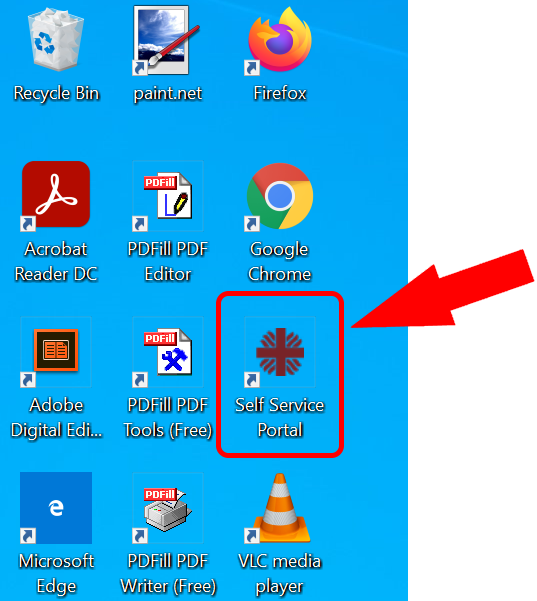
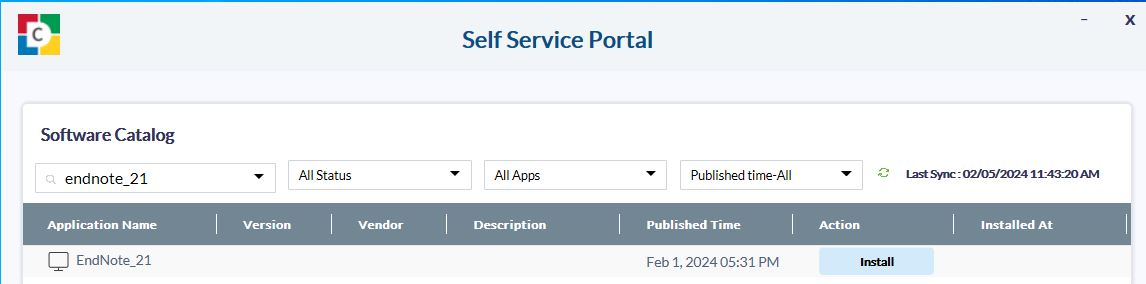
- Open Self Service Portal
- Select an appropriate EndNote version and click “Install”
[Note: You are recommended to install EndNote 21 for Windows 10] - Select the application “EndNote 21” and click “Install” to install your EndNote to the latest version
Note: If you encounter any difficulties in installing EndNote using the Self Service Portal, please contact the Information Technology Services Centre (ITSC) for assistance.
Create an EndNote library to save all title records you need to import
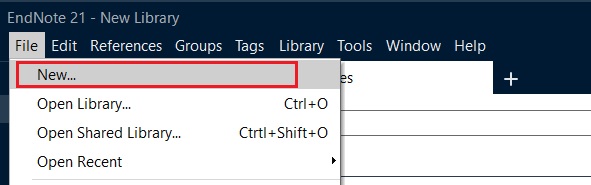
1. Select “File” at the top left corner and then click “New…”
Important Note:
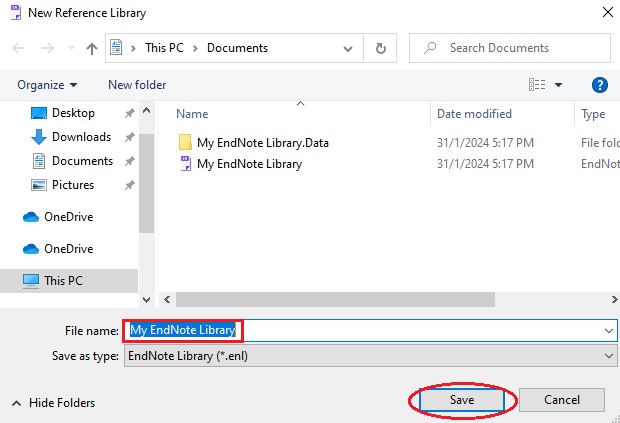
Once you created an EndNote library (.enl file), an accompanying data folder (.data folder) exists. This folder must not be removed as all bibliographical information and images are kept here. Doing so would disrupt the normal functioning of the EndNote software.
1. Select “File” at the top left corner and then click “New…”
Important Note:
Once you created an EndNote library (.enl file), an accompanying data folder (.data folder) exists. This folder must not be removed as all bibliographical information and images are kept here. Doing so would disrupt the normal functioning of the EndNote software.
To add references to EndNote, you have to export the title records in one or all of the following ways:
- Discovery Search
- Online Databases
- PDF Files
To export a record from Discovery Search:
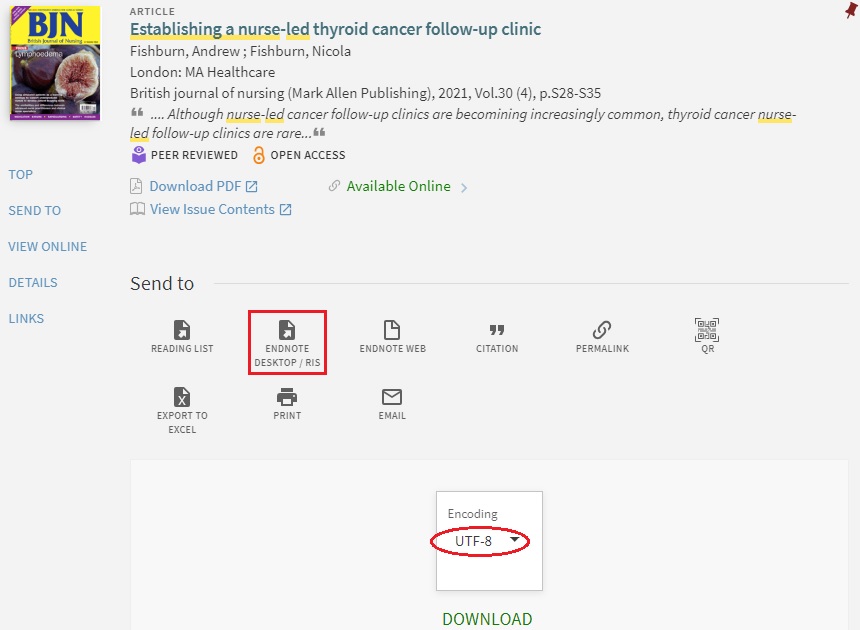
1. On the Discovery Search platform, select the title record you would like to export
2. Select “ENDNOTE DESKTOP / RIS” in the “Send to” section
3. Select “UTF-8” from the pull-down menu of “Encoding” and click “Download”
4. Open the downloaded file and the record will appear on your EndNote library
[Note: EndNote 21 will automatically open during the downloading process. However, if you have previously created more than one EndNote library, please select the one to which the record will be imported.]
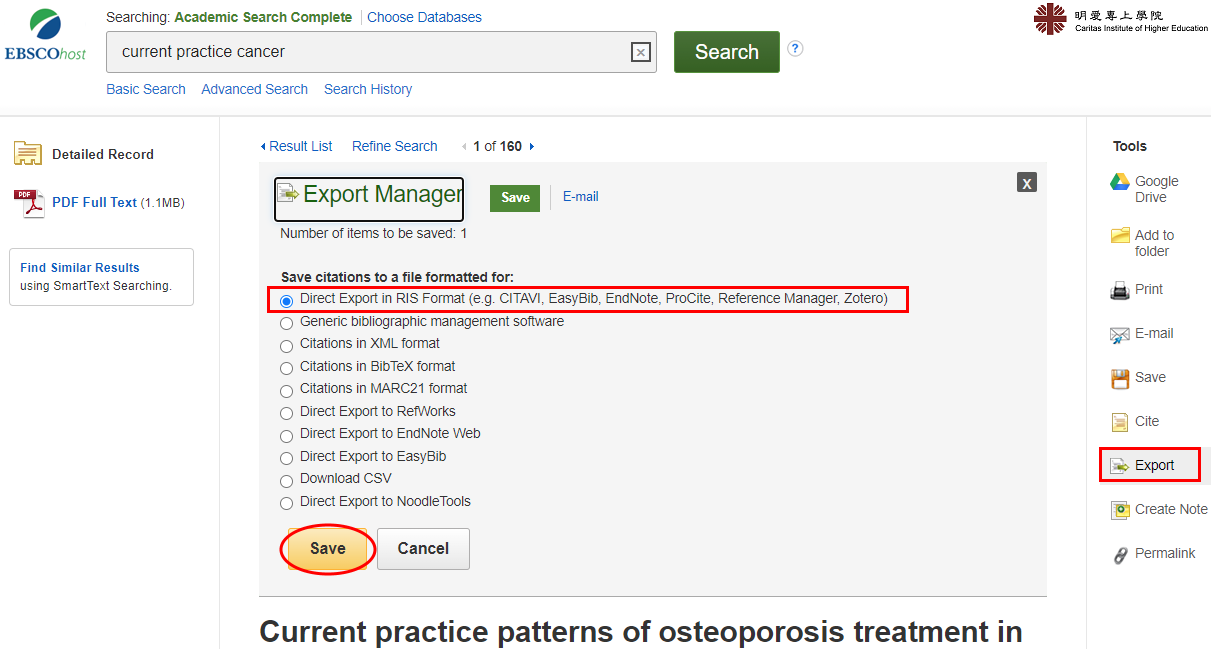
To export a record from an online database:
1. In the database, select the title record you would like to export
2. Click on the “Export” icon or similar options provided in the databases
[Note: The name of the icon varies, e.g. Export / Save, Citation Export]
3. Select “Direct Export in RIS Format” or similar options
4. Open the downloaded file and the record will appear on your EndNote library
[Note: EndNote 21 will automatically open during the downloading process. However, if you have previously created more than one EndNote library, please select the one to which the record will be imported.]
EBSCOhost Databases
ProQuest Databases
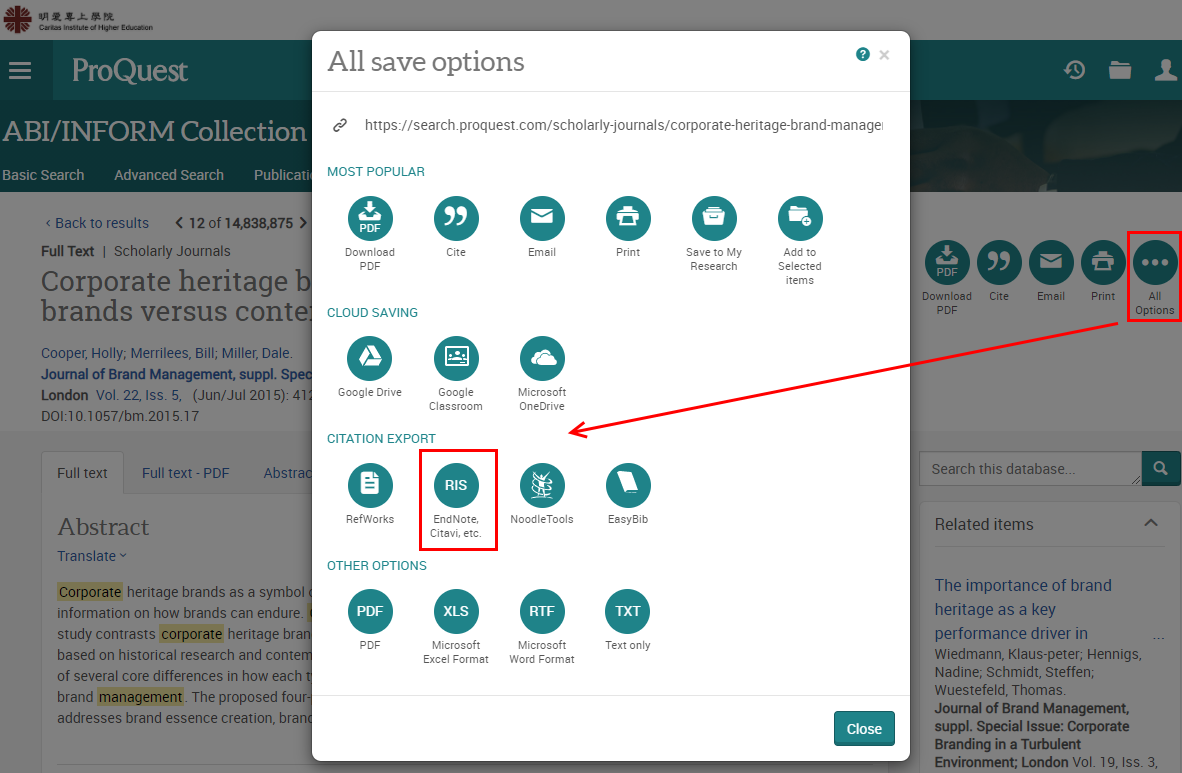
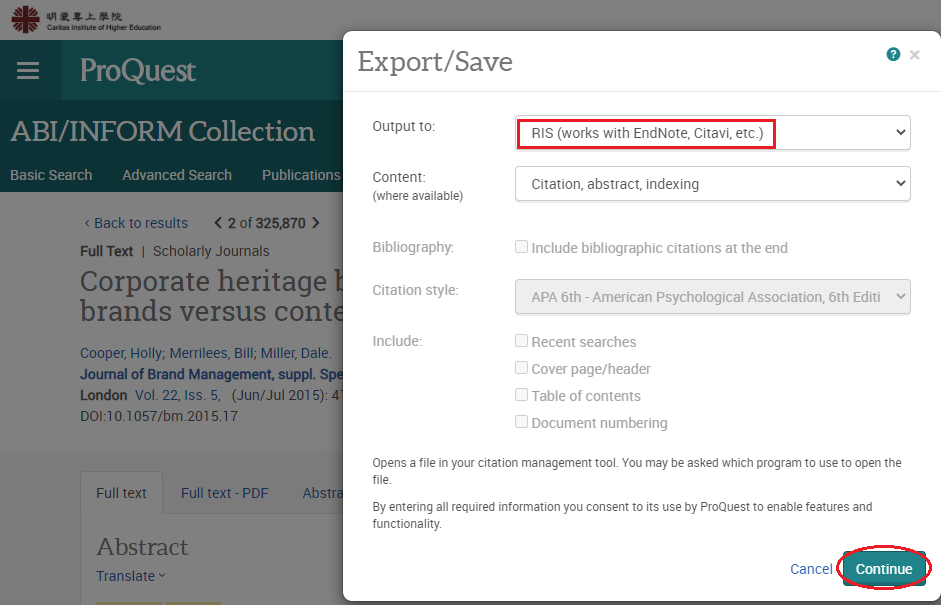
Endnote can automatically extract reference information (e.g. title, author, publication year) from PDF files as long as their DOIs (Digital Object Identifiers) are embedded in the files. For those without DOIs, you have to type in the reference information manually.
To import a PDF file with DOI:
1. In the EndNote library, go to “File” at the top left corner, choose “Import” and then “File...” from the pull-down menu
2. When the “Import File” pop-up window appears, click “Choose...” to select the PDF file in your PC
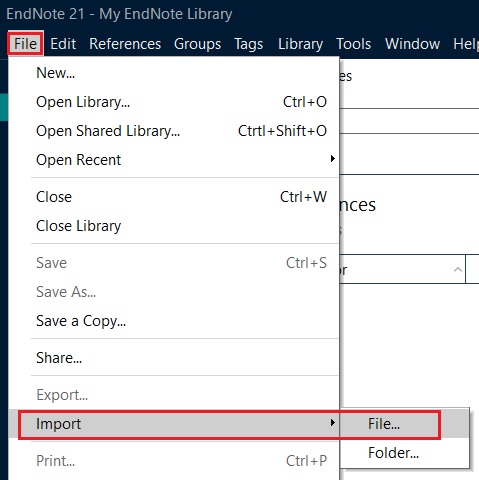
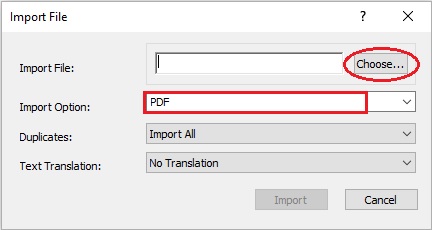
3. In “Import Option:”, select “PDF”
4. Click “Import” and the record will appear in the EndNote library
To import a PDF file with DOI:
1. In the EndNote library, go to “File” at the top left corner, choose “Import” and then “File...” from the pull-down menu
2. When the “Import File” pop-up window appears, click “Choose...” to select the PDF file in your PC
3. In “Import Option:”, select “PDF”
4. Click “Import” and the record will appear in the EndNote library
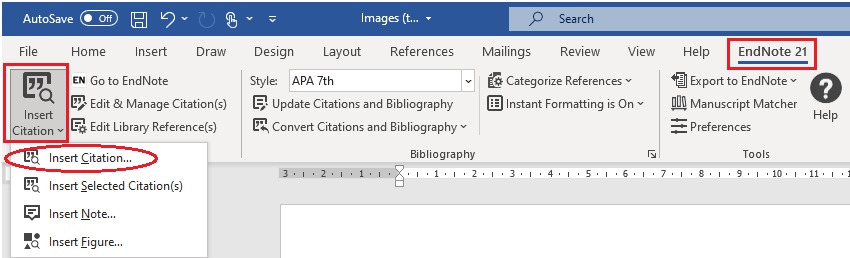
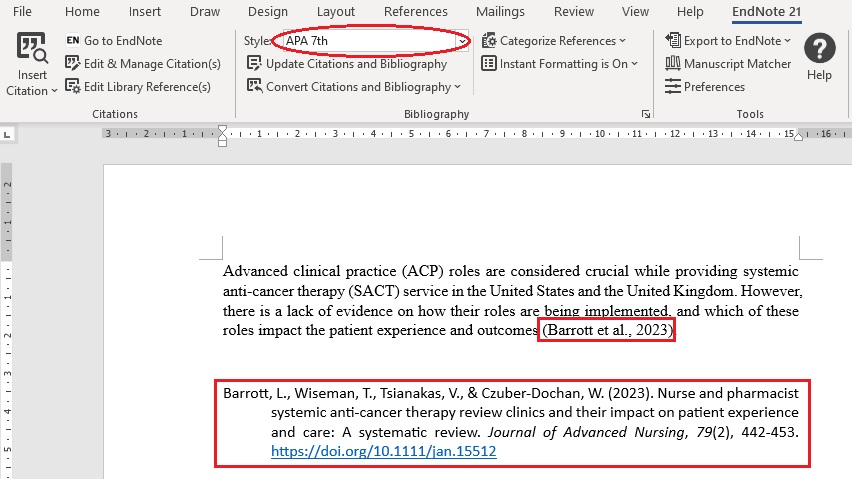
A “EndNote 21” tab will appear on the MS Word toolbar once the EndNote software has been installed on your PC. To insert citations in Word:
1. Open a Word file, place the cursor in the area where you would like the citation to appear
2. Click “Insert Citation...” at the top left corner of the Word file under the "EndNote 21" tab on the toolbar
3. When the “Find & Insert My References” pop-up window appears, type in the keywords to locate the titles in the library
you have previously created
4. Select the title and click “Insert” to add your selection to the Word file
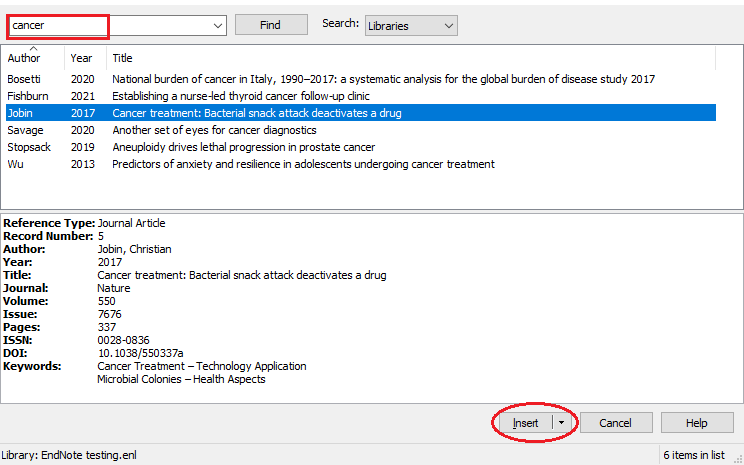
5. Both in-text citations and the reference entries will appear in your Word file
6. Choose the citation style (APA 7th) from the pull-down menu on the toolbar
1. Open a Word file, place the cursor in the area where you would like the citation to appear
2. Click “Insert Citation...” at the top left corner of the Word file under the "EndNote 21" tab on the toolbar
3. When the “Find & Insert My References” pop-up window appears, type in the keywords to locate the titles in the library
you have previously created
4. Select the title and click “Insert” to add your selection to the Word file
5. Both in-text citations and the reference entries will appear in your Word file
6. Choose the citation style (APA 7th) from the pull-down menu on the toolbar
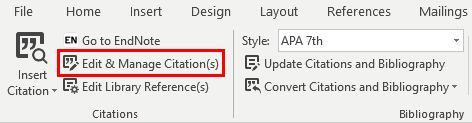
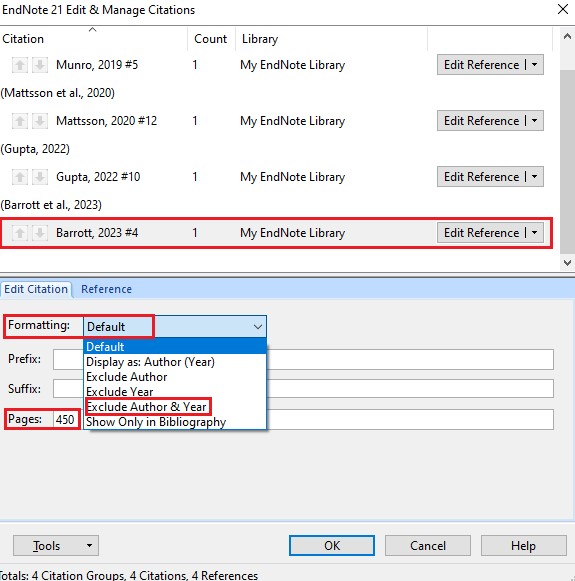
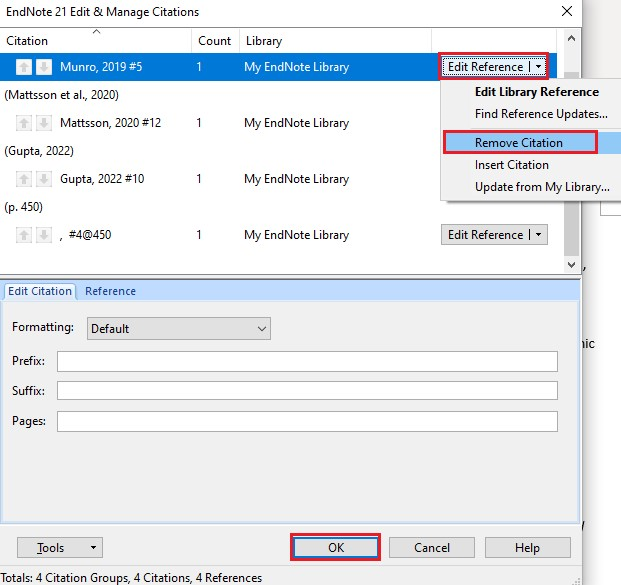
1. Place the cursor on the in-text citation you want to edit

2. Open “Edit & Manage Citation(s)” on the toolbar. A pop-up window appears.
3. Select edit options (e.g. Exclude Author & Year) from the pull-down menu next to “Formatting:”
4. Add page numbers if needed next to “Pages:”

2. Open “Edit & Manage Citation(s)” on the toolbar. A pop-up window appears.
3. Select edit options (e.g. Exclude Author & Year) from the pull-down menu next to “Formatting:”
4. Add page numbers if needed next to “Pages:”
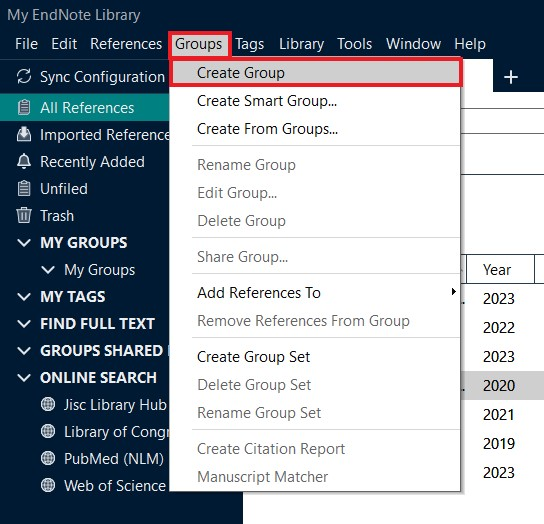
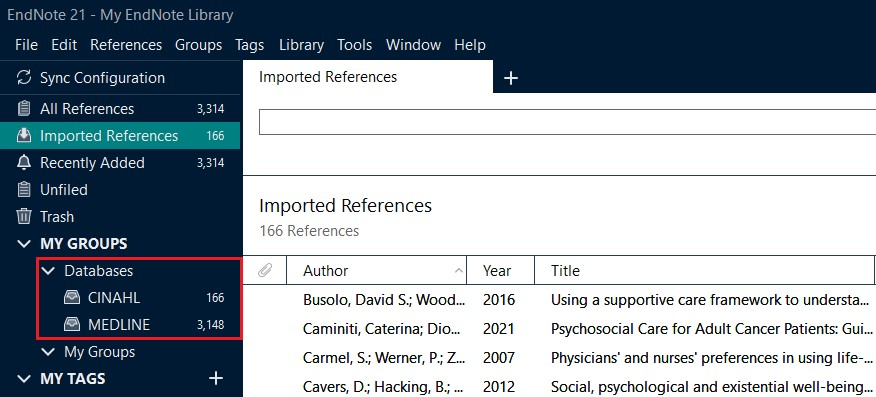
1. Go to the pull-down menu of “Groups” and select “Create Group”
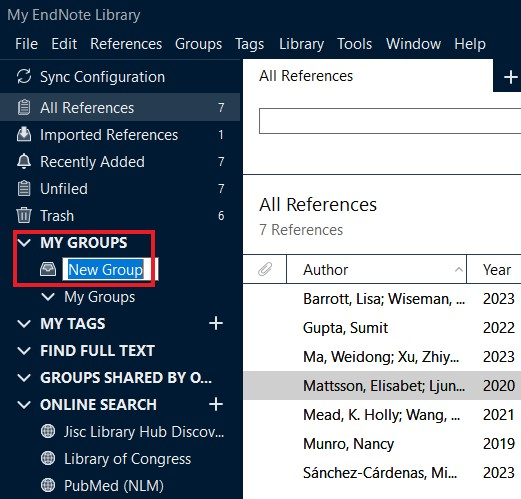
2. Name your group (e.g. cancer)
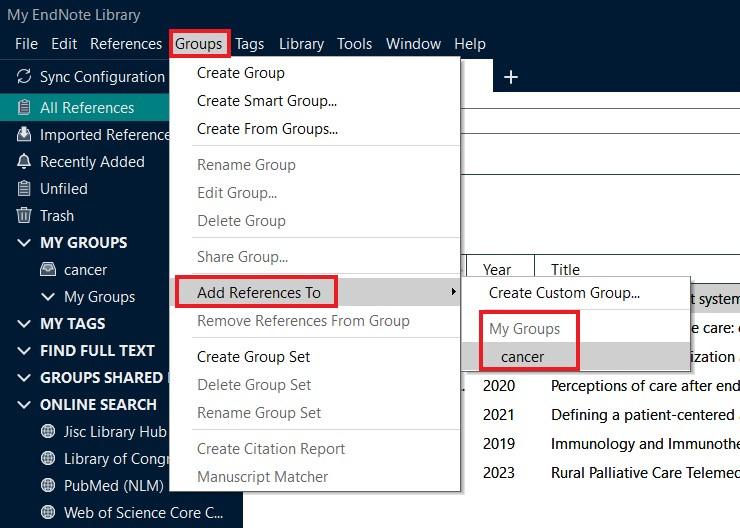
3. To add a title to the group, highlight it and select “Add references To” from the pull-down menu of “Groups”
[Note: Alternatively, highlight the title and then drag and drop it into the group]
2. Name your group (e.g. cancer)
3. To add a title to the group, highlight it and select “Add references To” from the pull-down menu of “Groups”
[Note: Alternatively, highlight the title and then drag and drop it into the group]
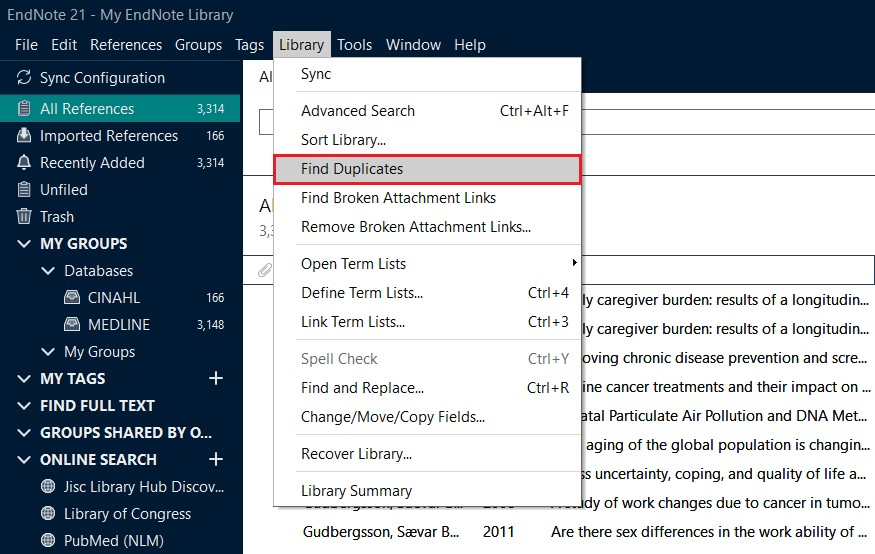
Find Duplicates is a function for finding imported references that are duplicated in EndNote. This is most suitable for screening out duplicated titles from a large number of references.
1. Import references from the databases you have searched into EndNote library
2. Create Groups to organize references retrieved from different databases (For details on how to create Groups, please refer to “How to Organize Your Reference Entries” section above)
3. Click Find Duplicates on the pull-down menu of “Library” to check for duplicated titles retrieved from multiple databases
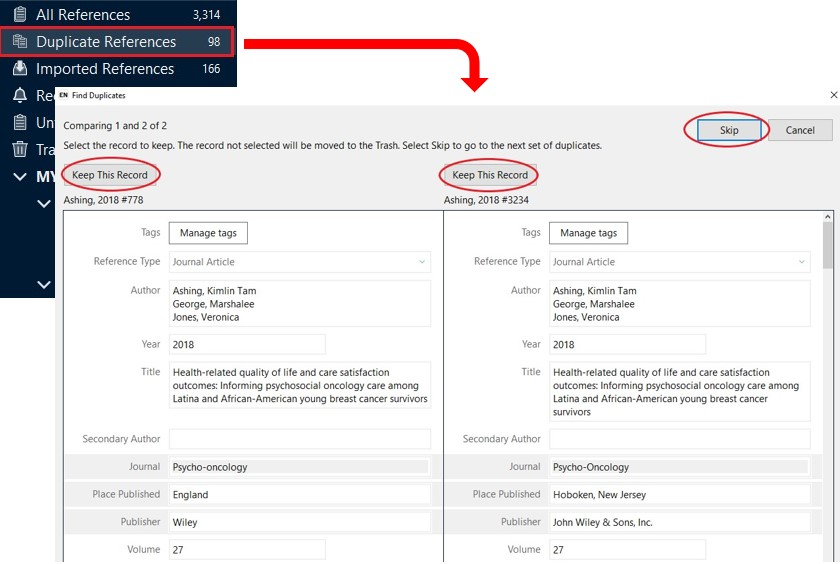
4. The number of duplicated titles is displayed on the pane, with a pop-up window showing the records of a duplicated title. Click Keep This Record to select the record you would like to keep in the EndNote library. The other will be moved to Trash automatically. If you have not made up your mind yet, click Skip to go to the next set of records.
1. Import references from the databases you have searched into EndNote library
2. Create Groups to organize references retrieved from different databases (For details on how to create Groups, please refer to “How to Organize Your Reference Entries” section above)
3. Click Find Duplicates on the pull-down menu of “Library” to check for duplicated titles retrieved from multiple databases
4. The number of duplicated titles is displayed on the pane, with a pop-up window showing the records of a duplicated title. Click Keep This Record to select the record you would like to keep in the EndNote library. The other will be moved to Trash automatically. If you have not made up your mind yet, click Skip to go to the next set of records.